Android Tutorial
Android Widgets
- UI Widgets
- Android Button
- Android Toast
- Android Custom Toast
- Android ToggleButton
- Android CheckBox
- Android Custom CheckBox
- Android RadioButton
- Android Dynamic RadioButton
- Custom RadioButton
- AlertDialog
- Spinner
- Auto Complete Text View
- ListView
- Custom ListView
- RatingBar
- WebView
- SeekBar
- DatePicker
- TimePicker
- Analog clock and Digital clock
- ProgressBar
- ScrollView Vertical
- HorizontalScrollView
- Image Switcher
- Image Slider
- ViewStub
- TabLayout
- TabLayout with FrameLayout
- SearchView
- SearchView on ToolBar
- EditText with TextWatcher
Activity and Intents
Android Fragments
Android Menu
Android Service
Android AlarmManager
Android Storage
Android SQLite
XML and JSON
Android Multimedia
Android Speech
Android Telephony
Android Device
Camera Tutorial
Sensor Tutorial
Android Graphics
Android Animation
Android Web Service
Android Examples
- QR Code / Bar Code Scanner
- RSS Feed Reader
- Volley Library Fetching JSON Data from URL
- Linkify Example
- Introduction Slider (Launch very first time when app start)
- RecyclerView List
- Swipe to Delete RecyclerView items with UNDU
- Swipe to refresh Android Activity
- Volley Library - Registration, Log-in, and Log-out
- Network Connectivity Services
- Firebase Authentication - Google Login
- Android Notification
- Using Google reCAPTCHA in Android Application
Android Social
Android Versions
Android Misc
- Android Device Manager
- Android Studio
- Android Auto
- Android to Mac
- Android Messages
- Android TV
- Android Screenshot
- Android Pay
- Android Watch
- Android Phones
- Android Tablet
- Android Find My Phone
- Android One
- Android Wear OS
- Android Data Recovery
- Android Antivirus
- Android x86
- Android Emulator for PC
- Android File Manager
- Android ad blocker
- Android Podcast App
- Fortnite Android an Epic Game
- FaceTime on Android
- ShowBox for Android
- Android App Store
- Virus Removal for Android
- cache in Android
- Root Android Device
- Android Screen Recorder
- block a number
- Canon printer app
- Wireless HP printer app
- How to Update Android
- iMessage for Android
- iCloud for Android
- Best Call Recorder
- Videoder Android
- YouTube Video Downloader
- Airdrop for Android
- RoboKiller for Android
- Clean my Android Phone
- How to hide apps, files, and photos on Android
- Best weather apps with widgets for Android
- Android File Transfer for Mac
- Mobdro for Android
- Screen Mirroring in Android
- Stock market apps for Android
- How to turn On or Off safe mode on Android
- Best browsers for Android
- Best clocks for Android
- Best email apps for Android
- Music player for Android
- Android smartwatch for women
- Best keyboard for Android
- Best messaging app for Android
Android MCQ
Android Interview
Android Quiz
iCloud for Android
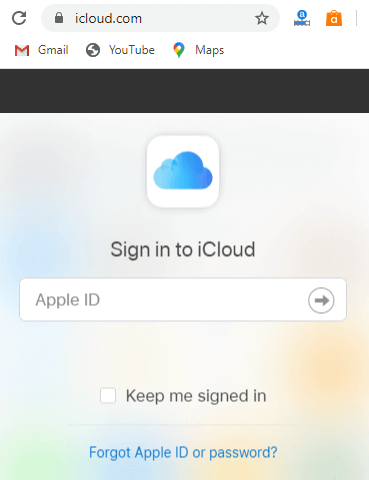
Using the iCloud on the Android device is quite easier. You are required to login into iCloud.com with your existing Apple ID or create a new account. After login, you will found the shortcuts of the iCloud app, such as Notes, Photos, Reminders, and even you will find iPhone. Your iCloud web app offers you to manage your account and see how much storage is available.

After login your iCloud account, you are able to view, upload, download, and share photos smoothly. You can also group your photos into albums, hide and unhide photos as usual.
How to add an iCloud email address to Android
The simplest method to set up your iCloud email address on your Android phone by creating an app-specific password for your iCloud email address.
Create an app-specific password for your iCloud account
- Open one of your favorite web browsers on your computer.
- Visit at applied.apple.com and login using your Apple ID.
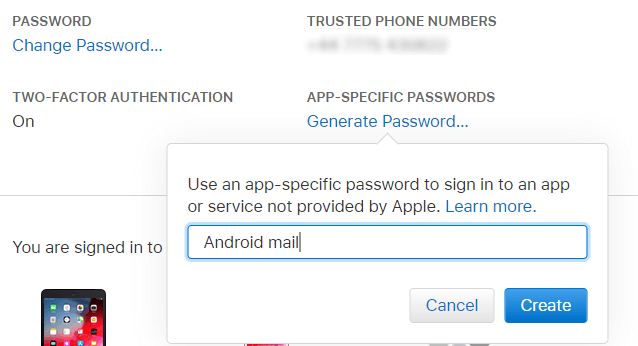
- Go to the Security section and click on Generate Password.
- Enter a description for the password.
- Click Create.
- Note down the generated password. This generated password will require to set up your iCloud email address on your Android device.

Add your iCloud email address to your Android phone
- Go to your Android device Settings options and search for Accounts.
- Tap on the Accounts option (it may vary depending upon the device manufacturers).
- Tap on the Add account option available at the bottom.
- Tap on the Personal (IMAP) option, which shows a Gmail logo.
- Enter your iCloud email address.
- Tap on the Next
- Enter the app-specific password which you generate on your web browser.
- Tap on the Next.
Your iCloud email address will appear in your account list. Now, you can access your iCloud inbox in the Gmail application.
Sync your iCloud contacts list to your Android phone
You can easily synchronize (sync) your iCloud contacts list to your Android phone. To sync the iCloud's contacts, open iCloud.com in your browser and login into it. Open the Contacts app of your Android phone and select the contacts that you want to export into your phone. Now, click on the gear icon, select Export vCard, and save the VCF file to your computer.
After saving the VCF file to your computer, you need to transfer this data to your Android phone, either by using cloud storage or by USB cable. Now, on your Android phone, open the Contacts, tap on the Menu option, and visit Settings > Import. Now, browse to the VCF file, which is stored in your Android phone, and import the contacts.
Note: The CVF file can also be imported into Google Contacts in your desktop web browser.
Synchronizing the contacts in this way is the preferable option. However, there are also apps available to sync iCloud contacts with Android phone. If you prefer to use apps for this, you can choose SmoothSync for Cloud Contacts ($4) or CardDav-Sync (free).
Viewing iCloud calendar on Android phone

- Login into your com account.
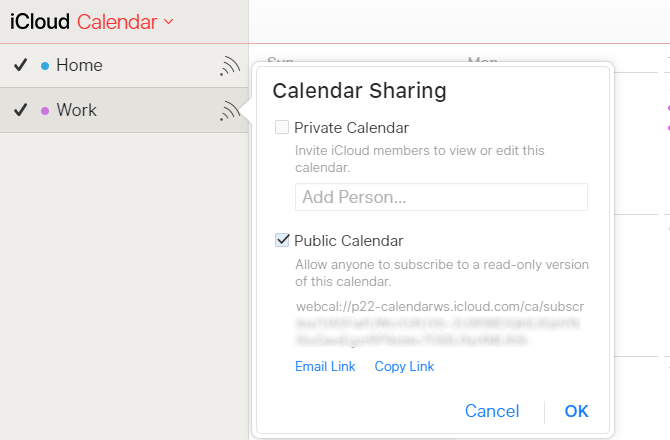
- Tap on the Calendar option; now select a calendar type that you wish to sync from the left side of the panel.
- Active the check-box of Public Calendar, click Email Link, this will prompt a WebCal URL.
- Send this prompt URL to an email address which you access from your Android phone.
- Now, install the CalDAV Sync app on your Android phone.
- Open your email on Android phone and copy the calendar URL.
- Launch the CalDAV Sync application and select Add Account> WebCal.
- Paste the copied calendar URL, click Next, and configure the settings as required.
- Click Done when settings finished.
Now, the iCloud calendar will appear in your Android phone's calendar app.


