Android Tutorial
Android Widgets
- UI Widgets
- Android Button
- Android Toast
- Android Custom Toast
- Android ToggleButton
- Android CheckBox
- Android Custom CheckBox
- Android RadioButton
- Android Dynamic RadioButton
- Custom RadioButton
- AlertDialog
- Spinner
- Auto Complete Text View
- ListView
- Custom ListView
- RatingBar
- WebView
- SeekBar
- DatePicker
- TimePicker
- Analog clock and Digital clock
- ProgressBar
- ScrollView Vertical
- HorizontalScrollView
- Image Switcher
- Image Slider
- ViewStub
- TabLayout
- TabLayout with FrameLayout
- SearchView
- SearchView on ToolBar
- EditText with TextWatcher
Activity and Intents
Android Fragments
Android Menu
Android Service
Android AlarmManager
Android Storage
Android SQLite
XML and JSON
Android Multimedia
Android Speech
Android Telephony
Android Device
Camera Tutorial
Sensor Tutorial
Android Graphics
Android Animation
Android Web Service
Android Examples
- QR Code / Bar Code Scanner
- RSS Feed Reader
- Volley Library Fetching JSON Data from URL
- Linkify Example
- Introduction Slider (Launch very first time when app start)
- RecyclerView List
- Swipe to Delete RecyclerView items with UNDU
- Swipe to refresh Android Activity
- Volley Library - Registration, Log-in, and Log-out
- Network Connectivity Services
- Firebase Authentication - Google Login
- Android Notification
- Using Google reCAPTCHA in Android Application
Android Social
Android Versions
Android Misc
- Android Device Manager
- Android Studio
- Android Auto
- Android to Mac
- Android Messages
- Android TV
- Android Screenshot
- Android Pay
- Android Watch
- Android Phones
- Android Tablet
- Android Find My Phone
- Android One
- Android Wear OS
- Android Data Recovery
- Android Antivirus
- Android x86
- Android Emulator for PC
- Android File Manager
- Android ad blocker
- Android Podcast App
- Fortnite Android an Epic Game
- FaceTime on Android
- ShowBox for Android
- Android App Store
- Virus Removal for Android
- cache in Android
- Root Android Device
- Android Screen Recorder
- block a number
- Canon printer app
- Wireless HP printer app
- How to Update Android
- iMessage for Android
- iCloud for Android
- Best Call Recorder
- Videoder Android
- YouTube Video Downloader
- Airdrop for Android
- RoboKiller for Android
- Clean my Android Phone
- How to hide apps, files, and photos on Android
- Best weather apps with widgets for Android
- Android File Transfer for Mac
- Mobdro for Android
- Screen Mirroring in Android
- Stock market apps for Android
- How to turn On or Off safe mode on Android
- Best browsers for Android
- Best clocks for Android
- Best email apps for Android
- Music player for Android
- Android smartwatch for women
- Best keyboard for Android
- Best messaging app for Android
Android MCQ
Android Interview
Android Quiz
Android x86
Android has become the most popular operating system for mobile device. However, desktop operating systems such as Mac, Linux, or Windows do not support Android apps natively. In this article, we will learn an alternative way to run Android applications on your computer using Android-x86 and VirtualBox.
Android-x86 is an open-source project which provides an unofficial installation of Google's Android operating system to run on devices powered by AMD and Intel x86 processor. This operating system is based on the Android Open Source Project (AOSP).AQ
You are required to follow several steps to run Android apps on your PC using Android-x86.
Step 1: The prerequisites
Install VirtualBox
VirtualBox is a program which helps you to run different operating systems on your existing OS, such as Mac, Linux, or Windows. As Android-x86 is a full-blown operating system, you should install VirtualBox so that you can use Android-x86 alongside your existing OS.
Download VirtualBox and install it on your computer.
Download Android-x86
Download the ISO file of Android-x86 from this link. It comes in both 32-bit (x86) and 64-bit (x64) variant. In this article, we are going to use the android-x86-6.0-r1.iso file.
Step 2: Setting up the virtual machine
Now, create a virtual machine (VM) inside VirtualBox. Open your VirtualBox and click the "New" icon. You will get a dialog box asking for virtual machine details. Provide it a name (in our case "Android"), and use the following settings:
- Operating system type: Linux
- Operating system version: Linux 2.6/3.x/4.x (32-bit)
- Memory size: 1024 MB
- Hard disk: For hard disk setting, select "Create a virtual hard disk now" and choose a "Dynamic allocated" hard disk file.
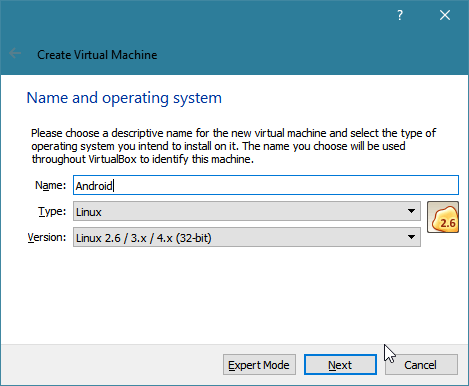
You will find a new virtual machine named "Android" has been created.
Step 3: installing Android-x86
Double click the virtual machine (power on), and it will ask for an ISO file to boot from. Select the Android-x86 ISO file which you downloaded.
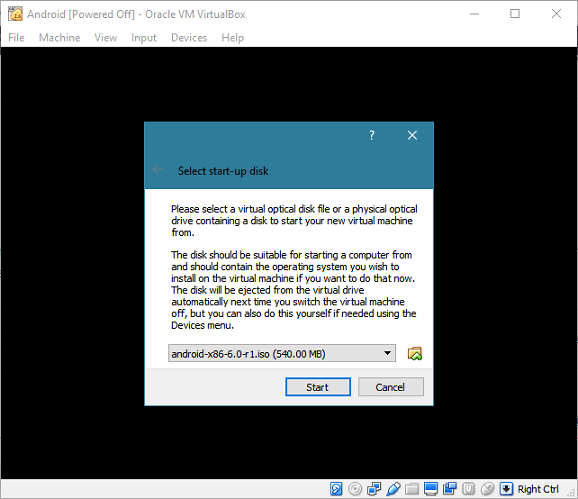
If this option is not shown to you, press F12 when the virtual machine starts to boot. Then, right-click on the CD icon in the status bar to add an ISO file. Then, press the key shown on the screen to boot from CD (ion our case, the key is "c").
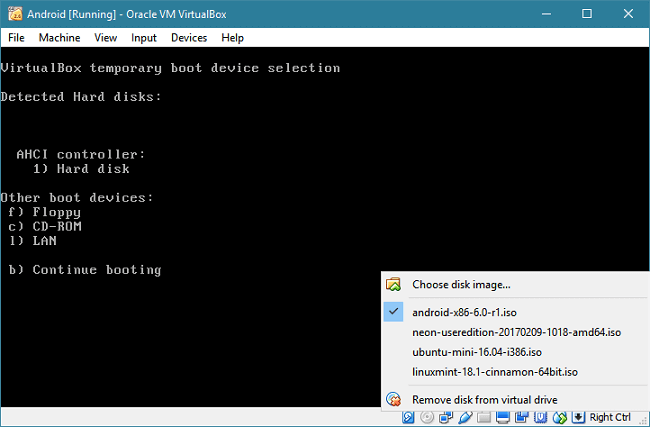
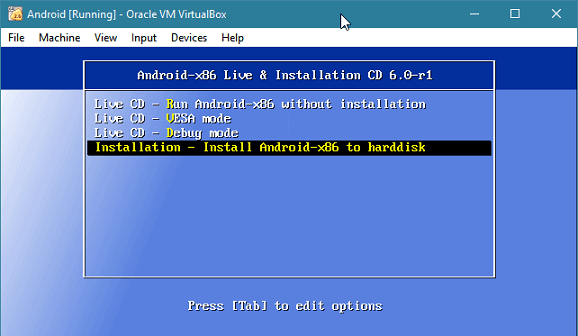
When the virtual machine boots up, select the installation option by arrow key up/down and press "Enter" to continue.
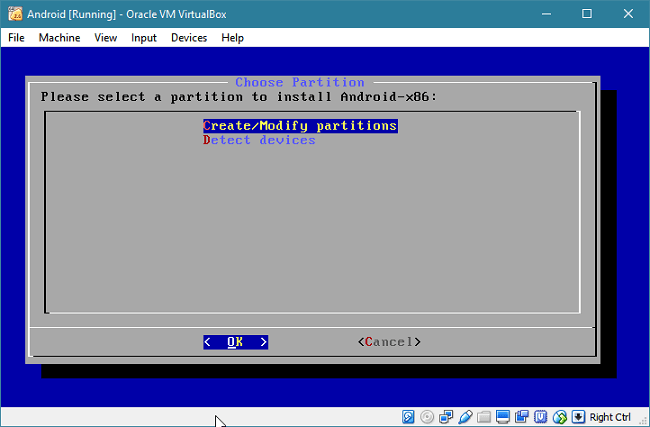
Now, you require to create a partition to install Android. Select the "Create/Modify partitions" option.
You will be taken to a text-based partition editing tool. Select a "New" option using left/right arrow keys and hit Enter. Then, choose the "Primary" option and hit Enter. You will be asked for the size of the partition.
Since, you install an OS to the partition, make it as bootable. Select the "Bootable" option and hit Enter. Finally, it looks like:
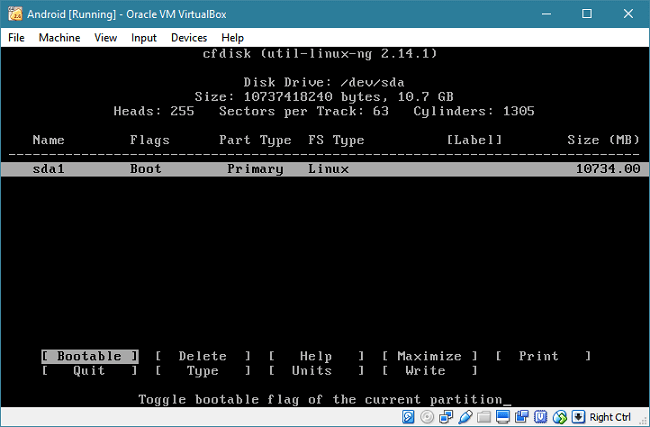
Select the "Write" option to save your changes. You have to input "yes" to confirm. Finally, you can quit the partition editor using the "Quit" option.
Now, select the partition where Android-x86 should be installed. The default is looking good, so press Enter.
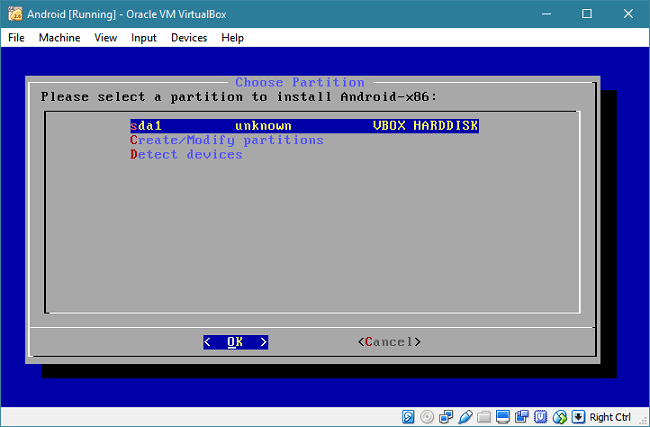
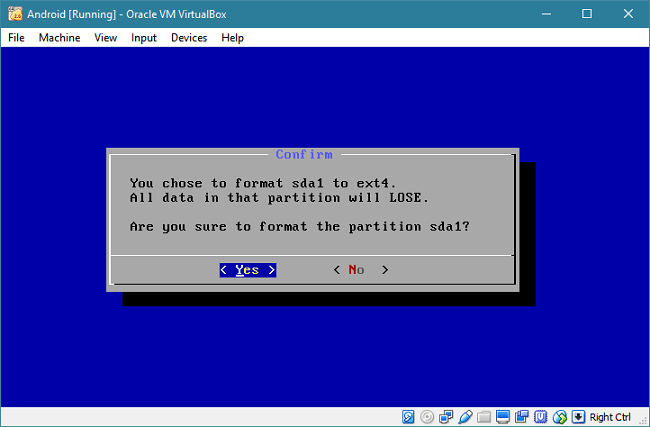
Select the "ext4" file system, and select "Yes" to format the disk.
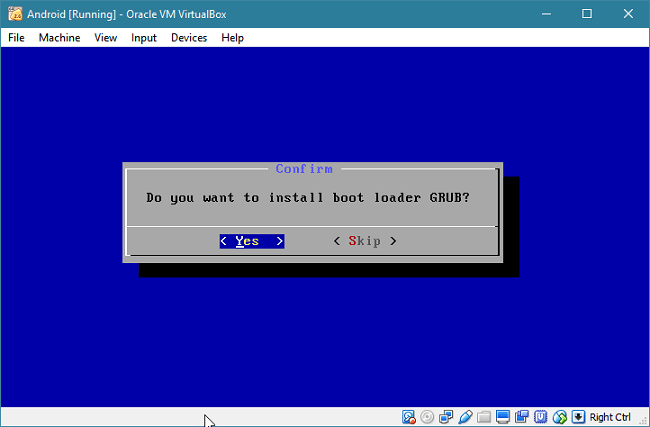
Select "Yes" to install the boot loader GRUB. After that, select "No" to skip installing the EFI version of GRUB as we won't need it.
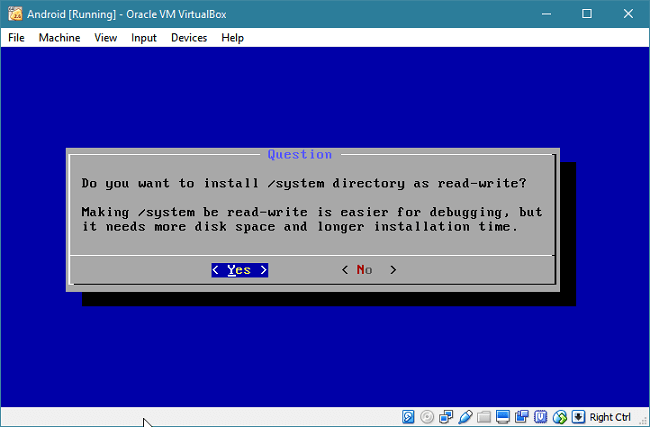
Select "Yes" to install the /system partition as read-write.
Wait for a few minutes to complete the installation. When it is completed, right-click the CD icon in the status bar and select "Remove disk from virtual drive". Select "Reboot" and press Enter. If you don't do this, you will end up booting from the ISO again, instead of the hard disk.
When the reboot is completed, Android will ask you for the initial setup, just like a tablet or regular smartphone.
Step 4: The initial setup
You may find a few oddities while trying to set up Android. Sometimes you may find that the mouse pointer doesn't show up. To fix this, you have to disable mouse integration from the "Input" menu.
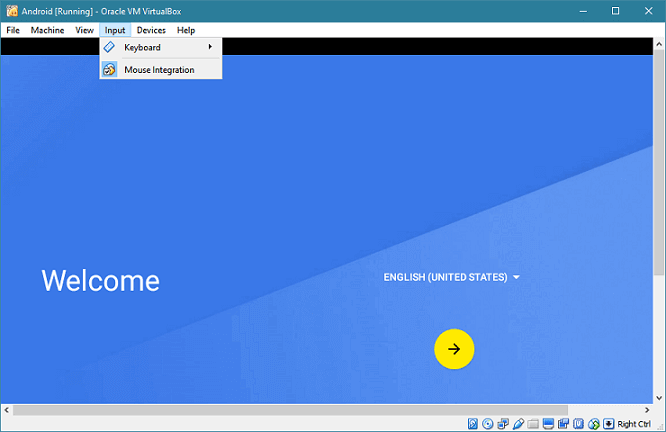
When you disable it, click on the VirtualBox window to use the mouse.
If your screen is too small to show full Android screen, press Right Ctrl + F to go full screen. You can exit from the full screen by pressing Right Ctrl + F again. You can also use "Scaled Mode" by pressing Right Ctrl + C.
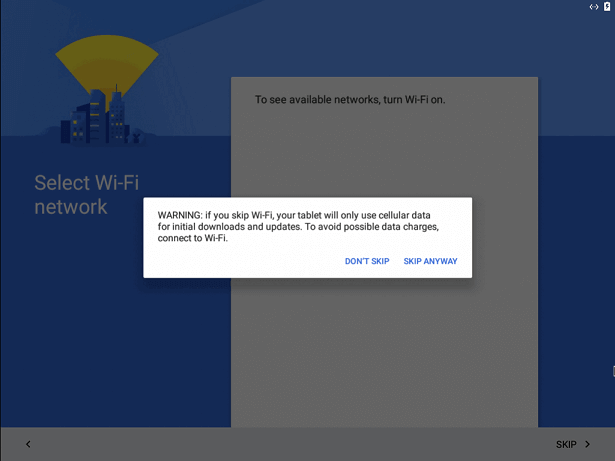
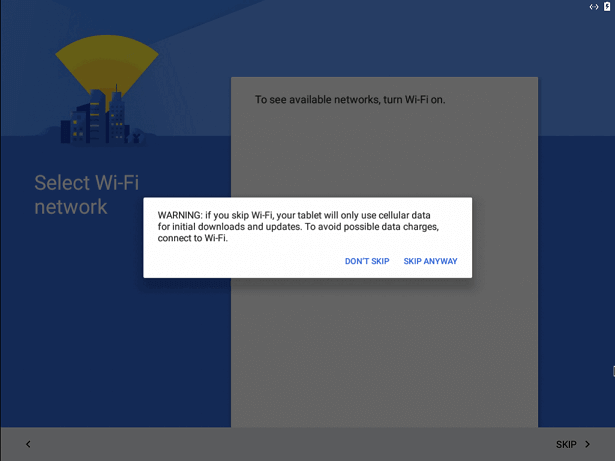
You can complete the setup by signing in your Google account. You may get a warning during the setup process, saying that there is no WI-Fi connection; you can skip it safely.
After the successful completion of the installation, you will be moved to the home screen.
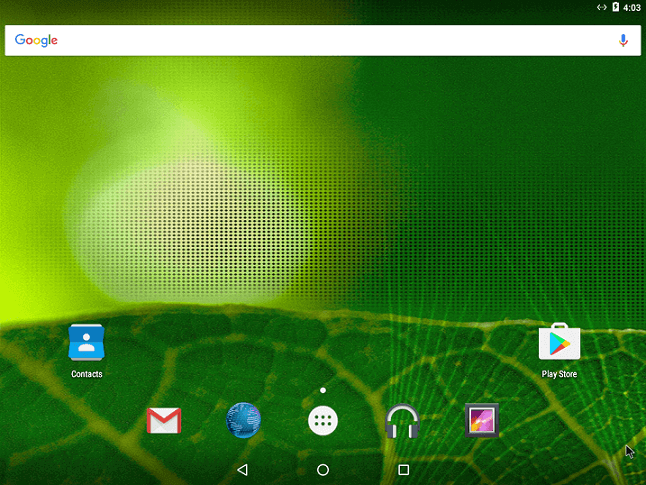
Now, you can install apps from the Google Play Store and surf the Internet.
