Android Tutorial
Android Widgets
- UI Widgets
- Android Button
- Android Toast
- Android Custom Toast
- Android ToggleButton
- Android CheckBox
- Android Custom CheckBox
- Android RadioButton
- Android Dynamic RadioButton
- Custom RadioButton
- AlertDialog
- Spinner
- Auto Complete Text View
- ListView
- Custom ListView
- RatingBar
- WebView
- SeekBar
- DatePicker
- TimePicker
- Analog clock and Digital clock
- ProgressBar
- ScrollView Vertical
- HorizontalScrollView
- Image Switcher
- Image Slider
- ViewStub
- TabLayout
- TabLayout with FrameLayout
- SearchView
- SearchView on ToolBar
- EditText with TextWatcher
Activity and Intents
Android Fragments
Android Menu
Android Service
Android AlarmManager
Android Storage
Android SQLite
XML and JSON
Android Multimedia
Android Speech
Android Telephony
Android Device
Camera Tutorial
Sensor Tutorial
Android Graphics
Android Animation
Android Web Service
Android Examples
- QR Code / Bar Code Scanner
- RSS Feed Reader
- Volley Library Fetching JSON Data from URL
- Linkify Example
- Introduction Slider (Launch very first time when app start)
- RecyclerView List
- Swipe to Delete RecyclerView items with UNDU
- Swipe to refresh Android Activity
- Volley Library - Registration, Log-in, and Log-out
- Network Connectivity Services
- Firebase Authentication - Google Login
- Android Notification
- Using Google reCAPTCHA in Android Application
Android Social
Android Versions
Android Misc
- Android Device Manager
- Android Studio
- Android Auto
- Android to Mac
- Android Messages
- Android TV
- Android Screenshot
- Android Pay
- Android Watch
- Android Phones
- Android Tablet
- Android Find My Phone
- Android One
- Android Wear OS
- Android Data Recovery
- Android Antivirus
- Android x86
- Android Emulator for PC
- Android File Manager
- Android ad blocker
- Android Podcast App
- Fortnite Android an Epic Game
- FaceTime on Android
- ShowBox for Android
- Android App Store
- Virus Removal for Android
- cache in Android
- Root Android Device
- Android Screen Recorder
- block a number
- Canon printer app
- Wireless HP printer app
- How to Update Android
- iMessage for Android
- iCloud for Android
- Best Call Recorder
- Videoder Android
- YouTube Video Downloader
- Airdrop for Android
- RoboKiller for Android
- Clean my Android Phone
- How to hide apps, files, and photos on Android
- Best weather apps with widgets for Android
- Android File Transfer for Mac
- Mobdro for Android
- Screen Mirroring in Android
- Stock market apps for Android
- How to turn On or Off safe mode on Android
- Best browsers for Android
- Best clocks for Android
- Best email apps for Android
- Music player for Android
- Android smartwatch for women
- Best keyboard for Android
- Best messaging app for Android
Android MCQ
Android Interview
Android Quiz
Option Menu
Android Option Menus are the primary menus of android. They can be used for settings, search, delete item etc.
Here, we are going to see two examples of option menus. First, the simple option menus and second, options menus with images.
Here, we are inflating the menu by calling the inflate() method of MenuInflater class. To perform event handling on menu items, you need to override onOptionsItemSelected() method of Activity class.
Android Option Menu Example
Let's see how to create menu in android. Let's see the simple option menu example that contains three menu items.
activity_main.xml
We have only one textview in this file.
File: activity_main.xml
<android.support.design.widget.CoordinatorLayout xmlns:android="http://schemas.android.com/apk/res/android"
xmlns:app="http://schemas.android.com/apk/res-auto"
xmlns:tools="http://schemas.android.com/tools"
android:layout_width="match_parent"
android:layout_height="match_parent"
tools:context="example.javatpoint.com.optionmenu.MainActivity">
<android.support.design.widget.AppBarLayout
android:layout_width="match_parent"
android:layout_height="wrap_content"
android:theme="@style/AppTheme.AppBarOverlay">
<android.support.v7.widget.Toolbar
android:id="@+id/toolbar"
android:layout_width="match_parent"
android:layout_height="?attr/actionBarSize"
android:background="?attr/colorPrimary"
app:popupTheme="@style/AppTheme.PopupOverlay" />
</android.support.design.widget.AppBarLayout>
<include layout="@layout/content_main" />
</android.support.design.widget.CoordinatorLayout>
File: context_main.xml
<android.support.constraint.ConstraintLayout xmlns:android="http://schemas.android.com/apk/res/android"
xmlns:app="http://schemas.android.com/apk/res-auto"
xmlns:tools="http://schemas.android.com/tools"
android:layout_width="match_parent"
android:layout_height="match_parent"
app:layout_behavior="@string/appbar_scrolling_view_behavior"
tools:context="example.javatpoint.com.optionmenu.MainActivity"
tools:showIn="@layout/activity_main">
<TextView
android:layout_width="wrap_content"
android:layout_height="wrap_content"
android:text="Hello World!"
app:layout_constraintBottom_toBottomOf="parent"
app:layout_constraintLeft_toLeftOf="parent"
app:layout_constraintRight_toRightOf="parent"
app:layout_constraintTop_toTopOf="parent" />
</android.support.constraint.ConstraintLayout>
menu_main.xml
It contains three items as show below. It is created automatically inside the res/menu directory.
File: menu_main.xml
xmlns:app="http://schemas.android.com/apk/res-auto"
xmlns:tools="http://schemas.android.com/tools"
tools:context="example.javatpoint.com.optionmenu.MainActivity">
<item android:id="@+id/item1"
android:title="Item 1"/>
<item android:id="@+id/item2"
android:title="Item 2"/>
<item android:id="@+id/item3"
android:title="Item 3"
app:showAsAction="withText"/>
</menu>
Activity class
This class displays the content of menu.xml file and performs event handling on clicking the menu items.
File: MainActivity.java
import android.os.Bundle;
import android.support.v7.app.AppCompatActivity;
import android.support.v7.widget.Toolbar;
import android.view.Menu;
import android.view.MenuItem;
import android.widget.Toast;
public class MainActivity extends AppCompatActivity {
@Override
protected void onCreate(Bundle savedInstanceState) {
super.onCreate(savedInstanceState);
setContentView(R.layout.activity_main);
Toolbar toolbar = (Toolbar) findViewById(R.id.toolbar);
setSupportActionBar(toolbar);
}
@Override
public boolean onCreateOptionsMenu(Menu menu) {
// Inflate the menu; this adds items to the action bar if it is present.
getMenuInflater().inflate(R.menu.menu_main, menu);
return true;
}
@Override
public boolean onOptionsItemSelected(MenuItem item) {
int id = item.getItemId();
switch (id){
case R.id.item1:
Toast.makeText(getApplicationContext(),"Item 1 Selected",Toast.LENGTH_LONG).show();
return true;
case R.id.item2:
Toast.makeText(getApplicationContext(),"Item 2 Selected",Toast.LENGTH_LONG).show();
return true;
case R.id.item3:
Toast.makeText(getApplicationContext(),"Item 3 Selected",Toast.LENGTH_LONG).show();
return true;
default:
return super.onOptionsItemSelected(item);
}
}
}
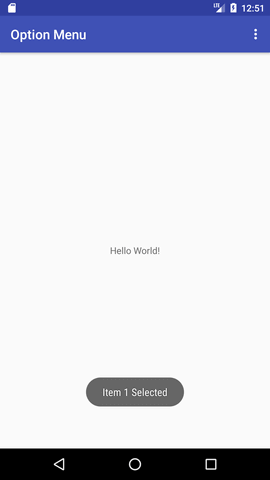
Output:
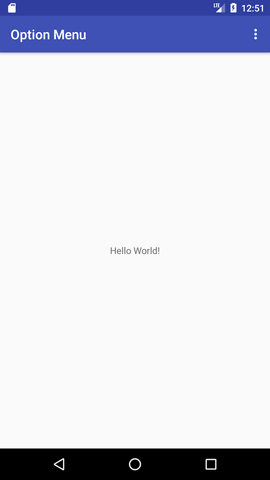
Output without clicking on the menu button.
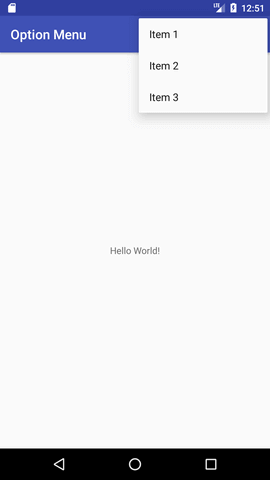
Output after clicking on the menu button.
Output after clicking on the second menu item .
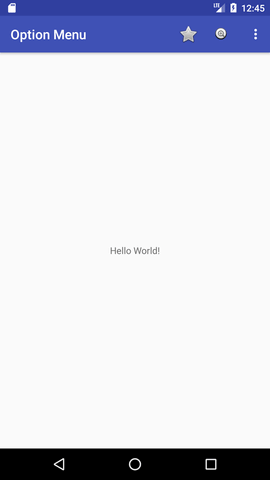
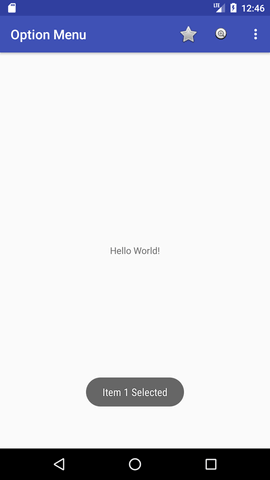
Option Menu with Icon
You need to have icon images inside the res/drawable directory. The android:icon element is used to display the icon on the option menu. You can write the string information in the strings.xml file. But we have written it inside the menu_main.xml file.
File: menu_main.xml
xmlns:app="http://schemas.android.com/apk/res-auto"
xmlns:tools="http://schemas.android.com/tools"
tools:context="example.javatpoint.com.optionmenu.MainActivity">
<item android:id="@+id/item1"
android:title="Item 1"
app:showAsAction="always"
android:icon="@android:drawable/btn_star"/>
<item android:id="@+id/item2"
android:title="Item 2"
app:showAsAction="ifRoom"
android:icon="@android:drawable/btn_plus"/>
<item android:id="@+id/item3"
android:title="Item 3"
app:showAsAction="withText"
android:icon="@android:drawable/btn_plus"/>
</menu>
