React Native Tutorial
- React Native Tutorial
- React Native Environment Setups
- React Native First Application Hello World
- React Native View
- React Native State
- React Native Props
- React Native Style
- React Native Height and Width
- React Native Button
- React Native Layout and Flexbox
- React Native Positioning Element with Flex
- React Native ScrollView
- React Native ListView
- React Native FlatList
- React Native SectionList
- React Native Touchables
- React Native Text Input
- React Native ActivityIndicator
- React Native Picker
- React Native StatusBar
- React Native Switch
- React Native WebView
- React Native ProgressBarAndroid
- React Native ProgressBar With Animated
Navigation
- React Native Navigation
- React Native Configuring Header Bar
- React Native Moving Between Screens
- React Native Passing Value between Screen
- React Native Tab Navigation
- React Native Adding Icons at the Bottom of Tab Navigation
- React Native Create Material Bottom Tab Navigator
- React Native Top Tab Navigator
- React Native Drawer Navigation
Storage
React Misc
- React Native Google Map
- React Native Modal
- React Native Vector Icons
- React Native Splash Screen
- React Native vs. Ionic
- React Native vs. Xamarin
- React Native vs Flutter
- React Native vs React
- React Native vs Swift
- Box shadow in React Native
- React Native IAP
- React-Native Localization
- React Native Toast
- React Native Sound
React Native Google Map
Google map is used to locate an address, navigate, and search location in the mobile devices. The Google Maps shows the location (latitude and longitude) using dot Marker. In the react-native, Google Maps is easily integrated using react-native-maps npm library. To use Google Maps in our application, we need to authenticate the Google Maps API.
1. Create the react-native project
Create the react-native project and install the react-native-maps library using the below command

After successful execution of the above code, it installs the react-native-maps library, which can be seen in package.json file.

2. Generate Google Maps authentication API key from the Google Developer Console
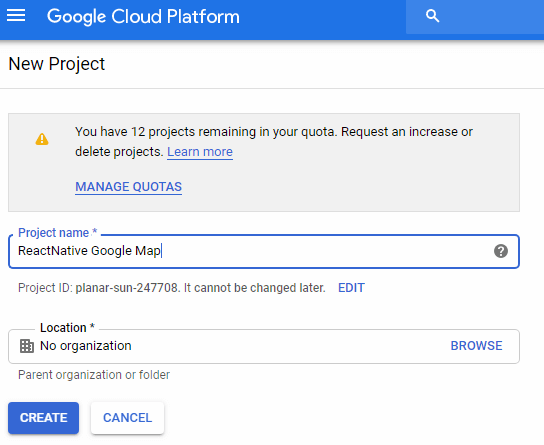
2.1 To use Google Maps in our application, we need to generate and authenticate the Google Maps API key. Login to https://console.developers.google.com/ with your google mail account and create a new project.
2.2 Now, click on API and Services -> Credentials -> Create credentials to create API credentials.
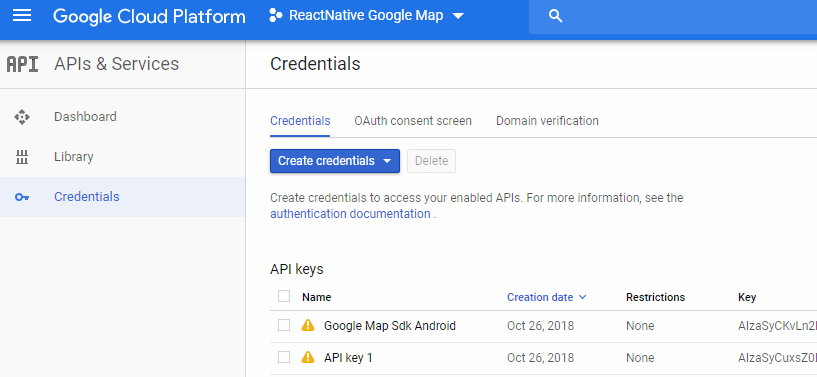
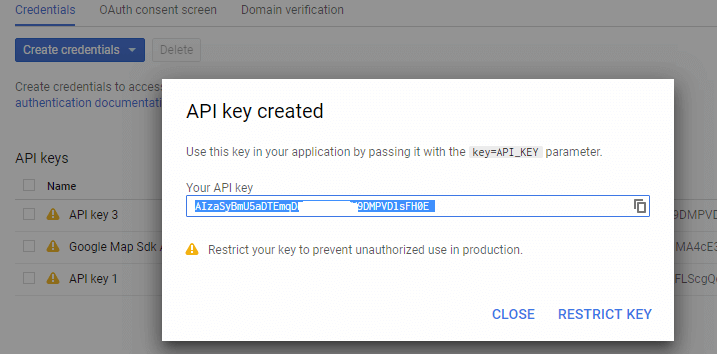
2.3 It will pop up your API key with message API key created.
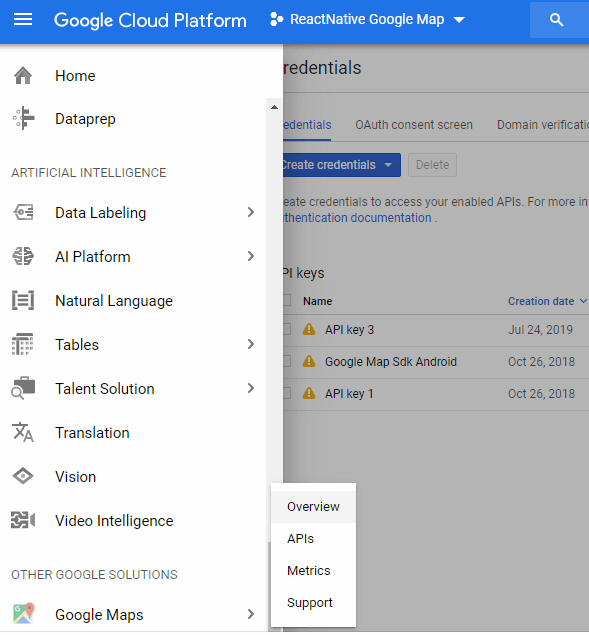
2.4 To see an overview of your API key, click Google Maps -> Overview.
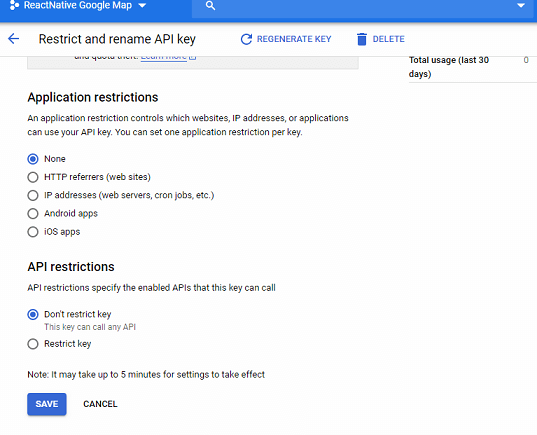
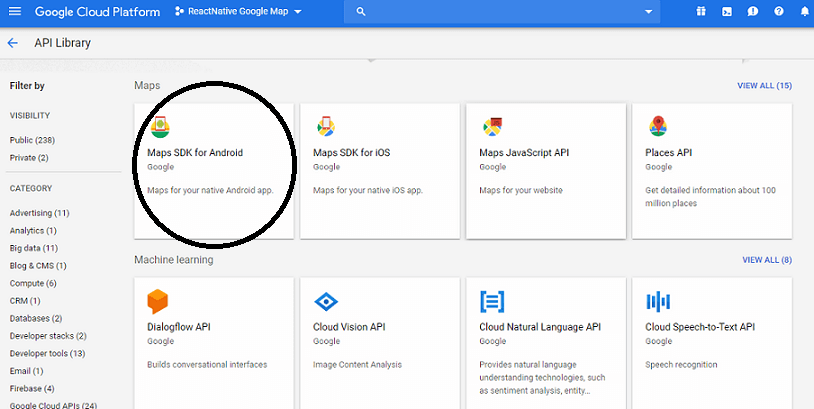
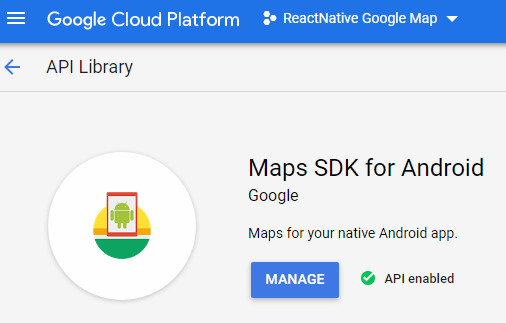
2.5 Now, go to API Library and select Maps SDK for Android to enable the Map API
3. Open your project_name -> android -> setting.gradle file and add the below code:
project(':react-native-maps').projectDir = new File(rootProject.projectDir, '../node_modules/react-native-maps/lib/android')
4. Again open your project_name ->android -> build.gradle file and add the below code in dependencies block.
5. Go to project_name -> android ->app->src->main->java->com->project_name-> MainApplication.java and add the below code:
...
new MapsPackage()
MainApplication.java
import android.app.Application;
import com.facebook.react.ReactApplication;
import com.airbnb.android.react.maps.MapsPackage;
import com.facebook.react.ReactNativeHost;
import com.facebook.react.ReactPackage;
import com.facebook.react.shell.MainReactPackage;
import com.facebook.soloader.SoLoader;
import com.airbnb.android.react.maps.MapsPackage;
import java.util.Arrays;
import java.util.List;
public class MainApplication extends Application implements ReactApplication {
private final ReactNativeHost mReactNativeHost = new ReactNativeHost(this) {
@Override
public boolean getUseDeveloperSupport() {
return BuildConfig.DEBUG;
}
@Override
protected List<ReactPackage> getPackages() {
return Arrays.<ReactPackage>asList(
new MainReactPackage(),
new MapsPackage()
);
}
@Override
protected String getJSMainModuleName() {
return "index";
}
};
@Override
public ReactNativeHost getReactNativeHost() {
return mReactNativeHost;
}
@Override
public void onCreate() {
super.onCreate();
SoLoader.init(this, /* native exopackage */ false);
}
6. In your project_name -> android -> app -> src -> main ->AndroidManifest.xml file add the below code inside application tag.
android:name="com.google.android.geo.API_KEY"
android:value="Your_Google_API_Key"/>
7. Import the MapView and Marker component from react-native-maps library in App.js file.
MapView: It is used to display the MapView component in the project.
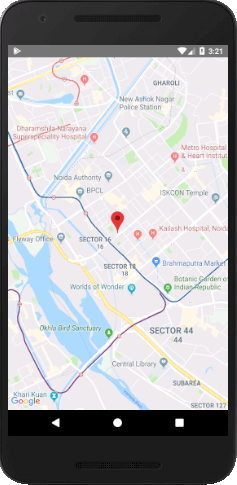
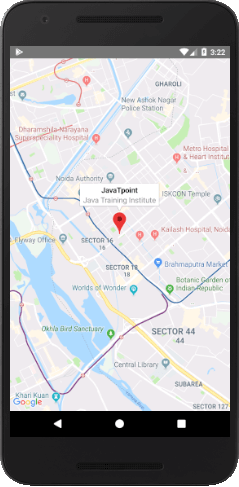
Marker: It is used to show the red round mark to pinpoint the exact location in Google Maps.
App.js
import { StyleSheet, View } from 'react-native';
import MapView from 'react-native-maps';
import { Marker } from 'react-native-maps';
export default class App extends Component {
render() {
return (
<View style={styles.MainContainer}>
<MapView
style={styles.mapStyle}
showsUserLocation={false}
zoomEnabled={true}
zoomControlEnabled={true}
initialRegion={{
latitude: 28.579660,
longitude: 77.321110,
latitudeDelta: 0.0922,
longitudeDelta: 0.0421,
}}>
<Marker
coordinate={{ latitude: 28.579660, longitude: 77.321110 }}
title={"JavaTpoint"}
description={"Java Training Institute"}
/>
</MapView>
</View>
);
}
}
const styles = StyleSheet.create({
MainContainer: {
position: 'absolute',
top: 0,
left: 0,
right: 0,
bottom: 0,
alignItems: 'center',
justifyContent: 'flex-end',
},
mapStyle: {
position: 'absolute',
top: 0,
left: 0,
right: 0,
bottom: 0,
},
});
Output:
