React Native Drawer Navigation
React Native Drawer Navigation is an UI panel which displays the app's navigation menu. By default it is hidden when not in use, but it appears when user swipes a finger from the edge of the screen or when user touches at the top of drawer icon added at app bar.
React Native Drawer Navigation imports the createDrawerNavigator from the react-navigation library.
It implements the createDrawerNavigator() to add the list of classes (screens).
To open and close the drawer, use the following helper methods:
this.props.navigation.closeDrawer();
If you like to toggle your drawer then call the following method:
Each of the above methods openDrawer(), closeDrawer(), and toggleDrawer() are simply dispatching actions as:
this.props.navigation.dispatch(DrawerActions.closeDrawer());
this.props.navigation.dispatch(DrawerActions.toggleDrawer());
Before creating the React Native drawer navigation, first go through the React Native Navigation where we discussed the react-navigation installation process.
React Native Drawer Navigation Example
Create two separate classes "DashboardScreen" and "WelcomeScreen" in the react native app to display on screen. Add these screens to createStackNavigator and add "md-menu" icon of 'react-native-vector-icons/Ionicons' package. On pressing the menu icon, call navigation.openDrawer() method to open drawer.
Now, import createDrawerNavigator from 'react-navigation' package and implement createDrawerNavigator(). After that add the stack navigation screen over it.
import { View, Text, StyleSheet, Button } from 'react-native';
import Icon from 'react-native-vector-icons/Ionicons';
import {
createSwitchNavigator,
createAppContainer,
createDrawerNavigator,
createStackNavigator
} from 'react-navigation';
export default class App extends Component {
render() {
return <AppContainer />;
}
}
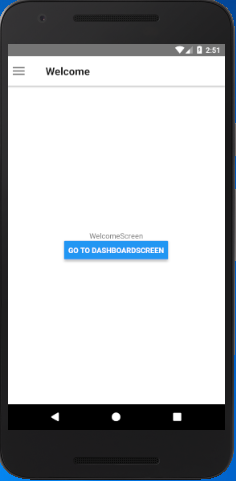
class WelcomeScreen extends Component {
static navigationOptions = {
title: 'Welcome',
};
render() {
return (
<View style={{ flex: 1, alignItems: 'center', justifyContent: 'center' }}>
<Text>WelcomeScreen</Text>
<Button
title="Go to DashboardScreen"
onPress={() => this.props.navigation.navigate('Dashboard')}
/>
</View>
);
}
}
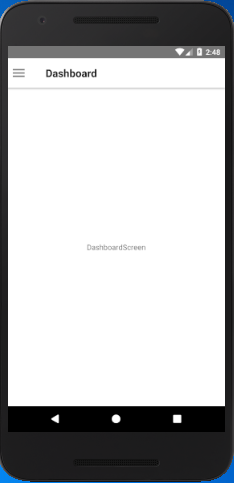
class DashboardScreen extends Component {
static navigationOptions = {
title: 'Dashboard',
};
render() {
return (
<View style={{ flex: 1, alignItems: 'center', justifyContent: 'center' }}>
<Text>DashboardScreen</Text>
</View>
);
}
}
const DashboardStackNavigator = createStackNavigator(
{
DashboardNavigator: DashboardScreen
},
{
defaultNavigationOptions: ({ navigation }) => {
return {
headerLeft: (
<Icon
style={{ paddingLeft: 10 }}
onPress={() => navigation.openDrawer()}
name="md-menu"
size={30}
/>
)
};
}
}
);
const WelcomeStackNavigator = createStackNavigator(
{
WelcomeNavigator: WelcomeScreen
},
{
defaultNavigationOptions: ({ navigation }) => {
return {
headerLeft: (
<Icon
style={{ paddingLeft: 10 }}
onPress={() => navigation.openDrawer()}
name="md-menu"
size={30}
/>
)
};
}
}
);
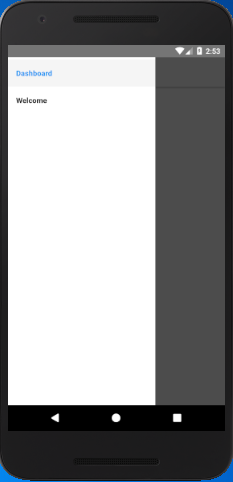
const AppDrawerNavigator = createDrawerNavigator({
Dashboard: {
screen: DashboardStackNavigator
},
Welcome: {
screen: WelcomeStackNavigator
},
});
const AppSwitchNavigator = createSwitchNavigator({
Dashboard: { screen: AppDrawerNavigator },
Welcome: { screen: WelcomeScreen },
});
const AppContainer = createAppContainer(AppSwitchNavigator);
const styles = StyleSheet.create({
container: {
flex: 1,
alignItems: 'center',
justifyContent: 'center'
}
});
Output: