React Native Tutorial
- React Native Tutorial
- React Native Environment Setups
- React Native First Application Hello World
- React Native View
- React Native State
- React Native Props
- React Native Style
- React Native Height and Width
- React Native Button
- React Native Layout and Flexbox
- React Native Positioning Element with Flex
- React Native ScrollView
- React Native ListView
- React Native FlatList
- React Native SectionList
- React Native Touchables
- React Native Text Input
- React Native ActivityIndicator
- React Native Picker
- React Native StatusBar
- React Native Switch
- React Native WebView
- React Native ProgressBarAndroid
- React Native ProgressBar With Animated
Navigation
- React Native Navigation
- React Native Configuring Header Bar
- React Native Moving Between Screens
- React Native Passing Value between Screen
- React Native Tab Navigation
- React Native Adding Icons at the Bottom of Tab Navigation
- React Native Create Material Bottom Tab Navigator
- React Native Top Tab Navigator
- React Native Drawer Navigation
Storage
React Misc
- React Native Google Map
- React Native Modal
- React Native Vector Icons
- React Native Splash Screen
- React Native vs. Ionic
- React Native vs. Xamarin
- React Native vs Flutter
- React Native vs React
- React Native vs Swift
- Box shadow in React Native
- React Native IAP
- React-Native Localization
- React Native Toast
- React Native Sound
React Native FlatList
The FlatList component displays the similar structured data in a scrollable list. It works well for large lists of data where the number of list items might change over time. The FlatList shows only those renders elements which are currently displaying on the screen, not all the elements of the list at once.
The FlatList component takes two required props: data and renderItem.
The data is the source of elements for the list, and renderItem takes one item from the source and returns a formatted component to render.
To implement the FlatList component, we need to import FlatList from 'react-native' library.
React Native FlatList Example
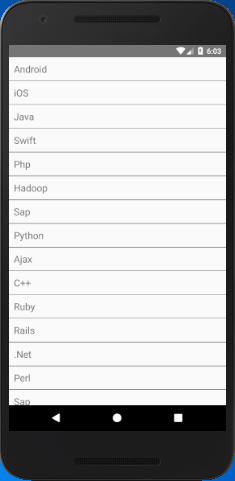
In this example, we provide hardcoded elements to data prop. Each element in the data props is rendered as a Text component.
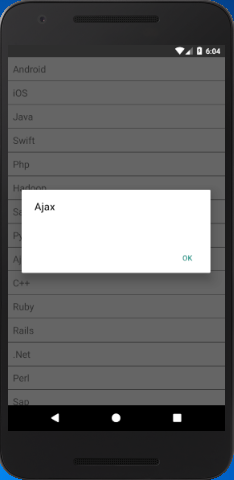
The ItemSeparatorComponent prop of FlatList is used to implement the separator between the elements of the list. To perform the click event on list items, we use onPress prop to Text.
import { AppRegistry, FlatList,
StyleSheet, Text, View,Alert } from 'react-native';
export default class FlatListBasics extends Component {
renderSeparator = () => {
return (
<View
style={{
height: 1,
width: "100%",
backgroundColor: "#000",
}}
/>
);
};
//handling onPress action
getListViewItem = (item) => {
Alert.alert(item.key);
}
render() {
return (
<View style={styles.container}>
<FlatList
data={[
{key: 'Android'},{key: 'iOS'}, {key: 'Java'},{key: 'Swift'},
{key: 'Php'},{key: 'Hadoop'},{key: 'Sap'},
{key: 'Python'},{key: 'Ajax'}, {key: 'C++'},
{key: 'Ruby'},{key: 'Rails'},{key: '.Net'},
{key: 'Perl'},{key: 'Sap'},{key: 'Python'},
{key: 'Ajax'}, {key: 'C++'},{key: 'Ruby'},
{key: 'Rails'},{key: '.Net'},{key: 'Perl'}
]}
renderItem={({item}) =>
<Text style={styles.item}
onPress={this.getListViewItem.bind(this, item)}>{item.key}</Text>}
ItemSeparatorComponent={this.renderSeparator}
/>
</View>
);
}
}
const styles = StyleSheet.create({
container: {
flex: 1,
},
item: {
padding: 10,
fontSize: 18,
height: 44,
},
})
AppRegistry.registerComponent('AwesomeProject', () => FlatListBasics);
Output:


