React Native Tutorial
- React Native Tutorial
- React Native Environment Setups
- React Native First Application Hello World
- React Native View
- React Native State
- React Native Props
- React Native Style
- React Native Height and Width
- React Native Button
- React Native Layout and Flexbox
- React Native Positioning Element with Flex
- React Native ScrollView
- React Native ListView
- React Native FlatList
- React Native SectionList
- React Native Touchables
- React Native Text Input
- React Native ActivityIndicator
- React Native Picker
- React Native StatusBar
- React Native Switch
- React Native WebView
- React Native ProgressBarAndroid
- React Native ProgressBar With Animated
Navigation
- React Native Navigation
- React Native Configuring Header Bar
- React Native Moving Between Screens
- React Native Passing Value between Screen
- React Native Tab Navigation
- React Native Adding Icons at the Bottom of Tab Navigation
- React Native Create Material Bottom Tab Navigator
- React Native Top Tab Navigator
- React Native Drawer Navigation
Storage
React Misc
- React Native Google Map
- React Native Modal
- React Native Vector Icons
- React Native Splash Screen
- React Native vs. Ionic
- React Native vs. Xamarin
- React Native vs Flutter
- React Native vs React
- React Native vs Swift
- Box shadow in React Native
- React Native IAP
- React-Native Localization
- React Native Toast
- React Native Sound
React Native Animation
React Native Animations provide an extra effect and great user experience in the app. Animations convey physically believable motion in your interface.
There are two types of complementary animation systems in React Native. These are:
Animated exports four different animated components as View, Text, Image and ScrollView. We can also create our own animated component using Animated.createAnimatedComponent().
Animated Methods
| Methods | Description |
|---|---|
| Animated.timing() | It animates a value over time using various easing curve, or by using own function. |
| Animated.event() | It maps event directly to animated values. |
| Animated.spring() | It animate the valueIt tracks the velocity of state to create fluid motion as toValue updates. |
| Animated.decay() | It starts the animations with initial velocity and gradually goes slows to stop. |
React Native Animation Example 1 (Animated.timing())
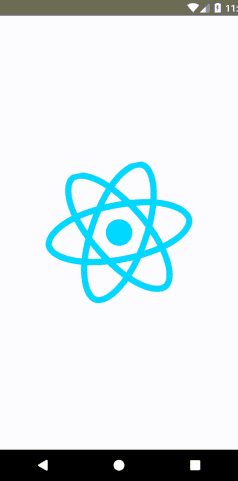
In this example, we will create a spinning animation on image using Animated.timing().
App.js
import {StyleSheet, AppRegistry,Text, View,Animated,Easing} from 'react-native';
export default class DisplayAnImage extends Component {
constructor () {
super()
this.spinValue = new Animated.Value(0)//declare spinValue as a new Animated.Value and pass 0 (zero) in it.
}
componentDidMount () {
this.spin()
}
//create a spin method and call it from componentDidMount
spin () {
this.spinValue.setValue(0) //set spinValue to 0 (zero)
Animated.timing( //calling Animated.timing() method, it takes two arguments:
this.spinValue, // value
{ // and config object
toValue: 1, //and setting spinValue to 1
duration: 4000, //within 4000 milliseconds
easing: Easing.linear
}
).start(() => this.spin())
}
render () {
const spin = this.spinValue.interpolate({
inputRange: [0, 1],
outputRange: ['0deg', '360deg']
})
return (
<View style={styles.container}>
<Animated.Image
style={{
width: 227,
height: 200,
transform: [{rotate: spin}] }}
source={require('MyReactNativeApp/img/react-logo.png')}
/>
</View>
)
}
}
const styles = StyleSheet.create({
container: {
flex: 1,
justifyContent: 'center',
alignItems: 'center'
}
})
// skip this line if you are using Create React Native App
AppRegistry.registerComponent('DisplayAnImage', () => DisplayAnImage);
The interpolate() method call any Animated.Value. It interpolates the value before updating the property. In above example, we map 0 (zero) degrees to 360 degrees.
We pass an inputRange [0,1] and get the outputRange['0deg', '360deg'] array.
Output:

React Native Animation Example 2 (Animated.timing())
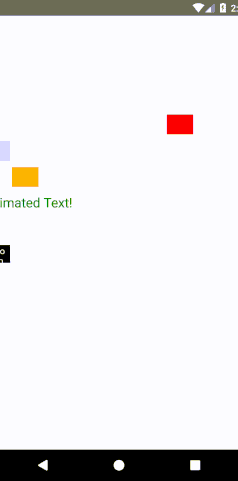
In this example, we declare a single animated value this.aninatedValue and use it with interpolate to create multiple animations, such as: marginLeft, opacity, fontSize, and rotate. We will interpolate these properties for styling such as opacity, margins, text sizes, and rotation properties.
App.js
import {StyleSheet, AppRegistry,Text, View,Animated,Easing} from 'react-native';
export default class DisplayAnImage extends Component {
constructor () {
super()
this.animatedValue = new Animated.Value(0)
}
componentDidMount () {
this.animate()
}//animate method is call from componentDidMount
animate () {
this.animatedValue.setValue(0)
Animated.timing(
this.animatedValue,
{
toValue: 1,
duration: 2000,
easing: Easing.linear
}
).start(() => this.animate())
}
render() {
const marginLeft = this.animatedValue.interpolate({
inputRange: [0, 1],
outputRange: [0, 300]
})
const opacity = this.animatedValue.interpolate({
inputRange: [0, 0.5, 1],
outputRange: [0, 1, 0]
})
const movingMargin = this.animatedValue.interpolate({
inputRange: [0, 0.5, 1],
outputRange: [0, 300, 0]
})
const textSize = this.animatedValue.interpolate({
inputRange: [0, 0.5, 1],
outputRange: [18, 32, 18]
})
const rotateX = this.animatedValue.interpolate({
inputRange: [0, 0.5, 1],
outputRange: ['0deg', '180deg', '0deg']
})
return (
<View style={styles.container}>
<Animated.View //returns Animated.View
style={{
marginLeft,
height: 30,
width: 40,
backgroundColor: 'red'}} />
<Animated.View
style={{
opacity,
marginTop: 10,
height: 30,
width: 40,
backgroundColor: 'blue'}} />
<Animated.View
style={{
marginLeft: movingMargin,
marginTop: 10,
height: 30,
width: 40,
backgroundColor: 'orange'}} />
<Animated.Text // returns Animated.Text
style={{
fontSize: textSize,
marginTop: 10,
color: 'green'}} >
Animated Text!
</Animated.Text>
<Animated.View
style={{
transform: [{rotateX}],
marginTop: 50,
height: 30,
width: 40,
backgroundColor: 'black'}}>
<Text style={{color: 'white'}}>Hello from TransformX</Text>
</Animated.View>
</View>
)
}
}
const styles = StyleSheet.create({
container: {
flex: 1,
paddingTop: 150
}
})
// skip this line if you are using Create React Native App
AppRegistry.registerComponent('DisplayAnImage', () => DisplayAnImage);
Output:

LayoutAnimation API
LayoutAnimation allow to globally configure, create, and update animations. This will be used for all views in the next render/layout cycle.
The LayoutAnimation is quite useful, it has much less control than Animated and other animation libraries.
To use this API in Android we need to set the following flags via UIManager:
UIManager.setLayoutAnimationEnabledExperimental(true);
React Native LayoutAnimation Example
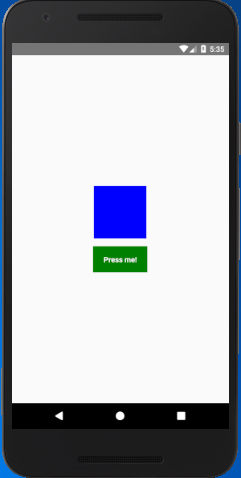
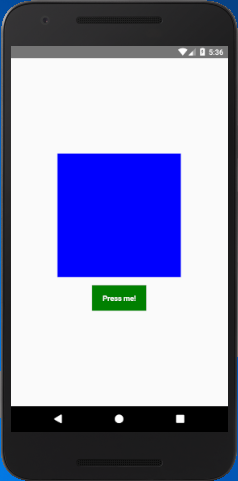
In this example, we create a TouchableOpacity and a View component. On pressing the TouchableOpacity component calls the _onPress() method and it animates the View component by increases width and height of View by 15 unit.
import {
NativeModules,
LayoutAnimation,
Text,
TouchableOpacity,
StyleSheet,
View,
} from 'react-native';
const { UIManager } = NativeModules;
UIManager.setLayoutAnimationEnabledExperimental &&
UIManager.setLayoutAnimationEnabledExperimental(true);
export default class App extends React.Component {
state = {
w: 100,
h: 100,
};
_onPress = () => {
// Animate the update
LayoutAnimation.spring();
this.setState({w: this.state.w + 15, h: this.state.h + 15})
}
render() {
return (
<View style={styles.container}>
<View style={[styles.box, {width: this.state.w, height: this.state.h}]} />
<TouchableOpacity onPress={this._onPress}>
<View style={styles.button}>
<Text style={styles.buttonText}>Press me!</Text>
</View>
</TouchableOpacity>
</View>
);
}
}
const styles = StyleSheet.create({
container: {
flex: 1,
alignItems: 'center',
justifyContent: 'center',
},
box: {
width: 200,
height: 200,
backgroundColor: 'blue',
},
button: {
backgroundColor: 'green',
paddingHorizontal: 20,
paddingVertical: 15,
marginTop: 15,
},
buttonText: {
color: '#fff',
fontWeight: 'bold',
},
});
Output:


