Azure Tutorial
Azure Storage Service
Network Services
Compute Services
App Services
Database Service
Azure Misc
- What is MS Azure Functions
- What is ETL
- What is Microsoft Azure Instance
- What is Databrick
- Why is PowerShell Used
- What is a Notebook in Ms Azure
- What is Azure Resource Manager
- What is a container group In Microsoft Azure
- What is Microsoft Azure Functions Premium plan
- What is Microsoft Azure Subscription
- What is Azure Lighthouse
- Active Directory Identity in Azure and access management operations
- What is Privileged Access Management for Active Directory Domain Services in Azure
- What is the difference between Azure DevOps Server and Azure DevOps Services
- Azure Fundamentals
Azure Interview Questions
Virtual Network
The Azure Virtual Network is a logical representation of the network in the cloud. So, by creating an Azure Virtual Network, we can define our private IP address range on Azure, and also deploy different kinds of Azure resources. For Example - Azure virtual machine, App service environment, Integration service environment, etc.
Azure Vnet Capabilities
Following are the capabilities of the Azure Vnet:
Isolation and segmentation: To deploy resources such as virtual machines into virtual networks, they will be isolated from other resources. By putting the virtual machine into your virtual network, it cannot be reached from the Internet or other Azure resources unless we enable communication in between. We can also use subnets within virtual networks to further segment our resources within the network.
Communication with the Internet: All resources in a virtual network can communicate outbound to the Internet by default. But it needs to establish an inbound connection from the Internet. We can either use public IP or load balancers.
Communication between resources: Communication between the number of resources inside the virtual network or with other resources through service endpoints.
Communication with on-premises resources: By establishing either point to site VPN or site to site VPN or Express route, your workloads within Azure virtual network can seamlessly communicate with workloads within our on-premises data center.
There are lots of capabilities within the Azure virtual network that we can use to control the traffic.
Filter network traffic: We can use Network Security Groups, Application Security Group, Azure firewall, or third-party network virtual appliance to filter the traffic coming to the resources in the virtual network.
Route network traffic: We can route the network traffic using the routing tables, we can configure user-defined routes to route all the outbound traffic, let's say via a firewall.
Monitor network traffic: By network security groups and traffic analytics monitoring solution, you'll be able to carry out extensive monitoring on both inbound and outbound communications.
Subnet
Subnet plays a vital role because many configurations will be done at a subnet level. It is a range of IP addresses in the VNet. Vnet can be divided into multiple subnets based on different design considerations, for example - we can deploy a virtual machine, App services environment, integration service environment, etc. VMs & PaaS services deployed to subnets n the same VNet and can communicate with each other without any extra configuration. Route tables, NSG, Service endpoints, and policies are configured to the subnets.
Creating Azure Virtual Network and subnets
Step 1: Select your existing resource group, or you can create a new resource group.

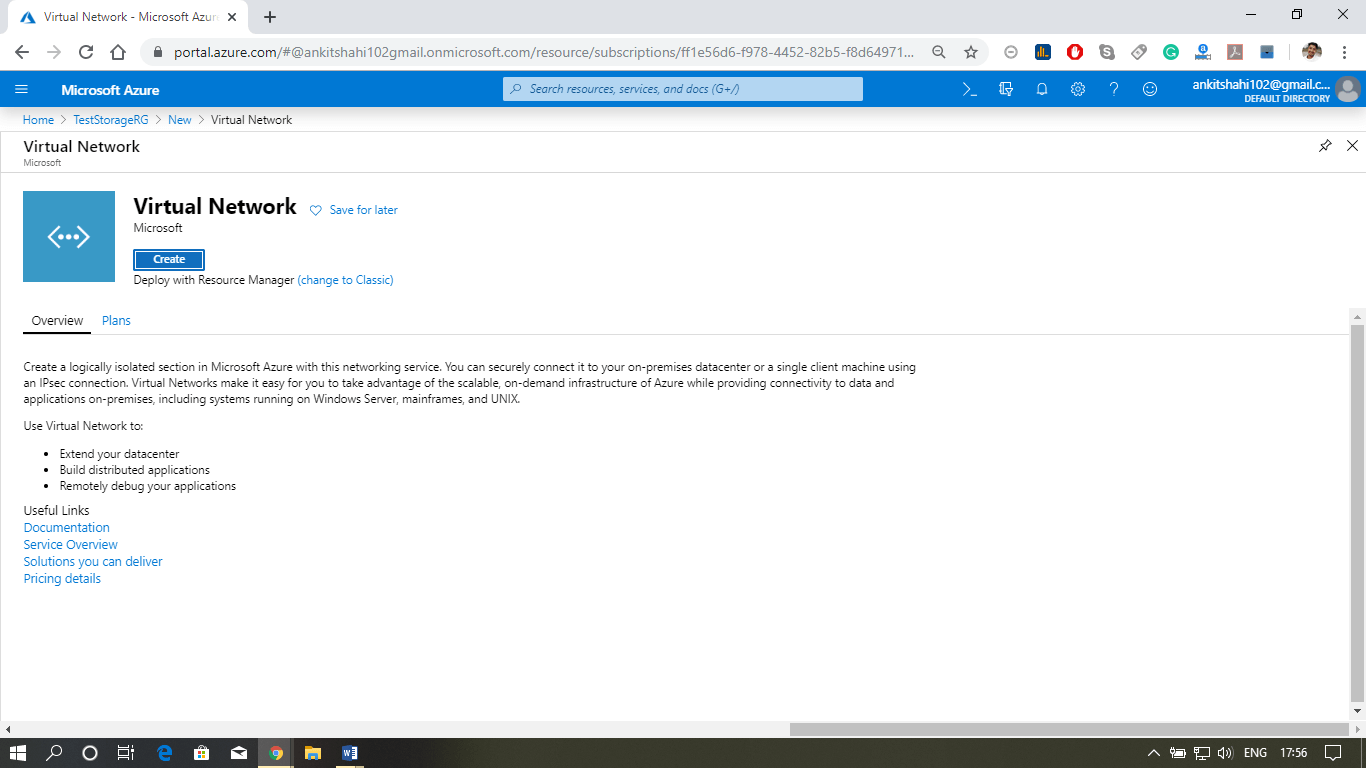
Step 2: After opening your resource group, click on Add then type in Virtual network in the search box. Click on Create.

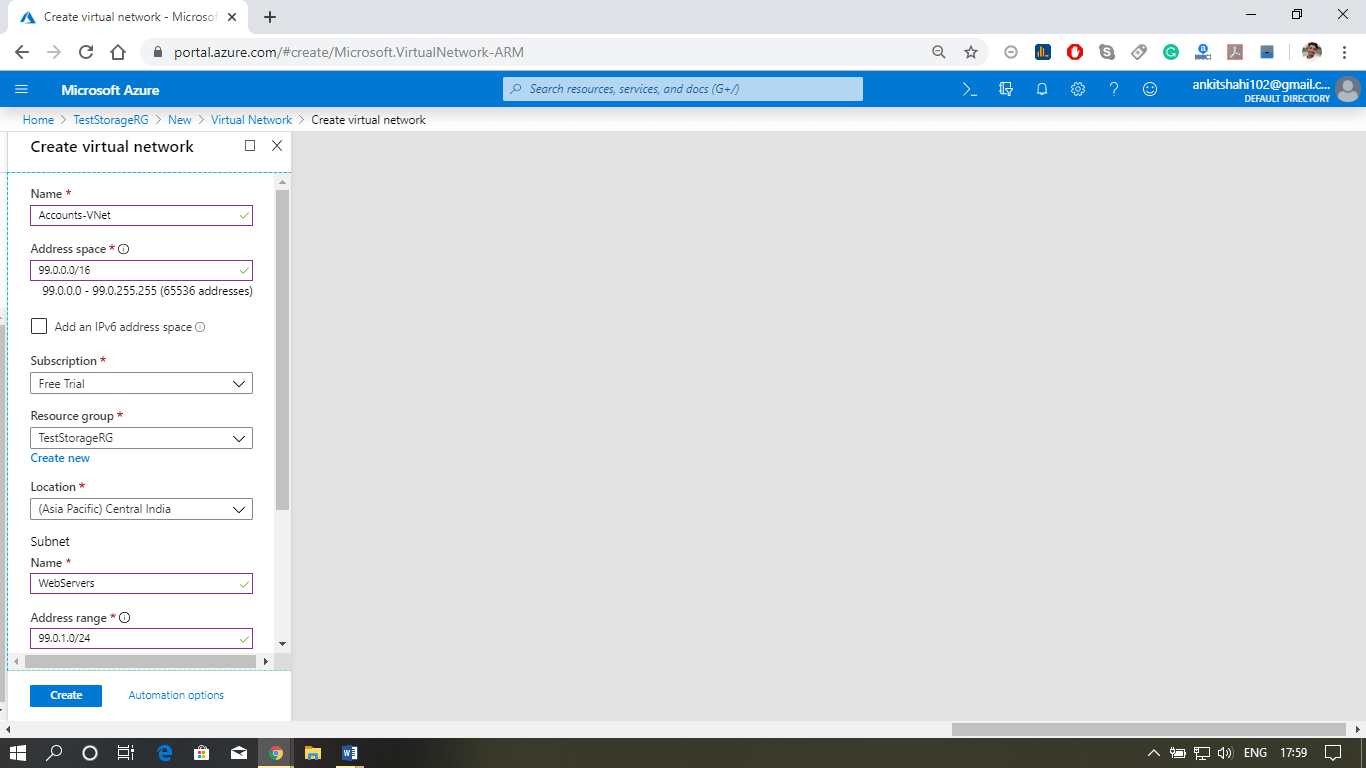
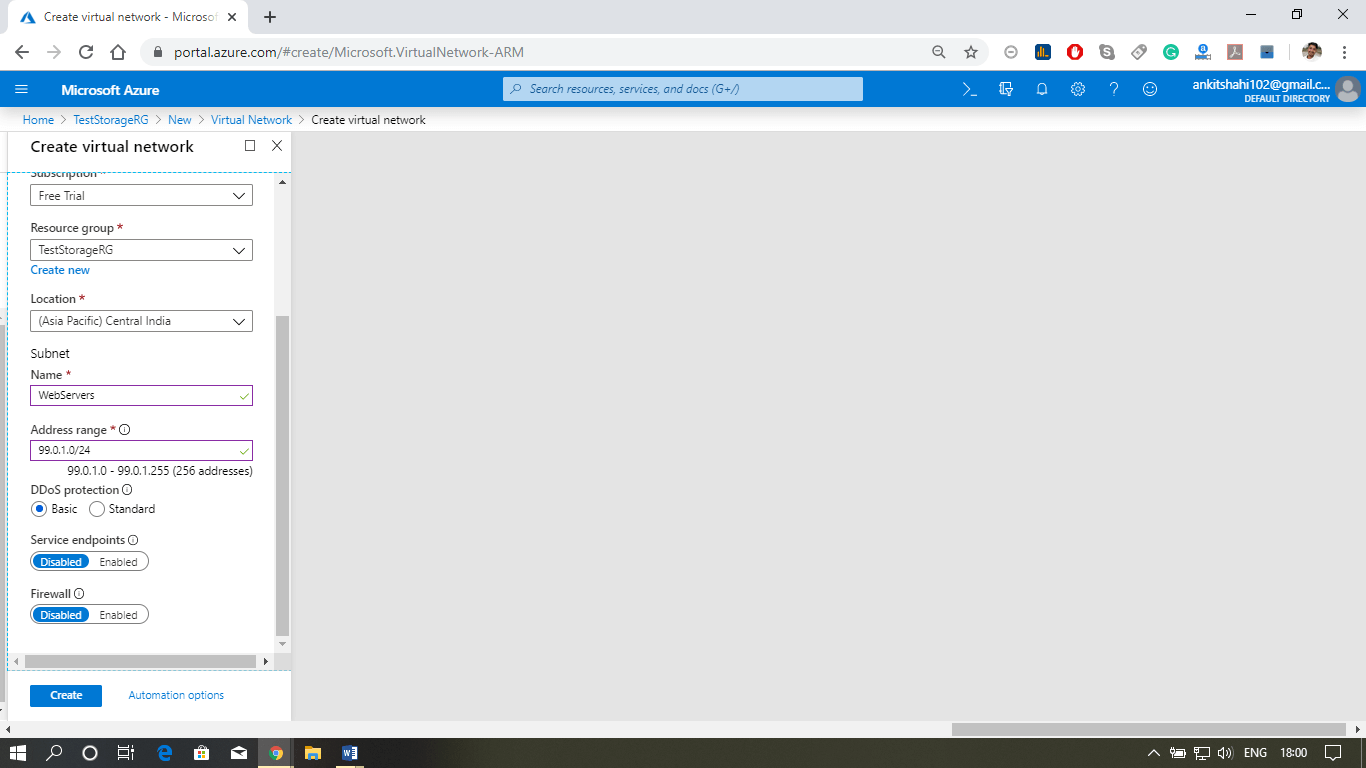
Step 3: A new window will appear, where you need to fill the details like - name, address space (e.g., 99.0.0.0/16), Name of the subnet, subnet address space (e.g., 99.0.1.0/24). Leave everything as it is and click on create.

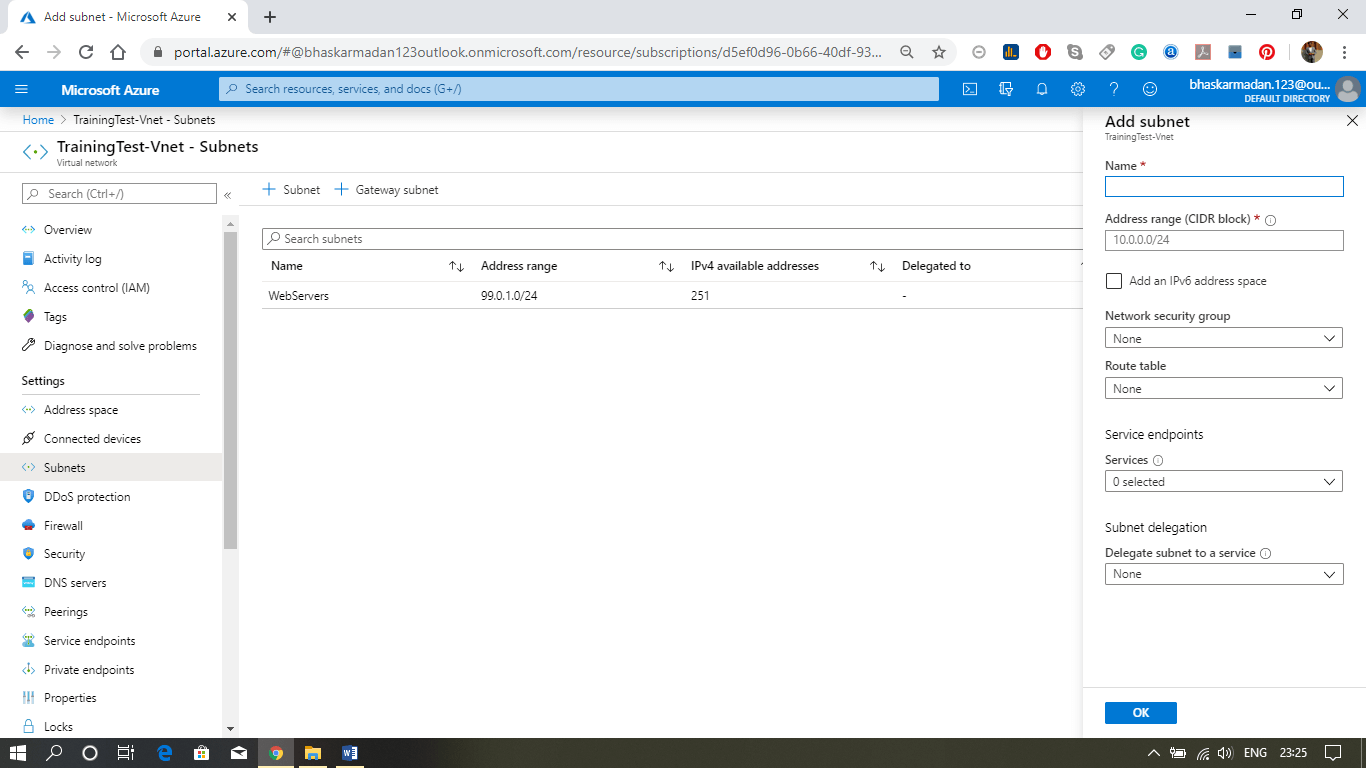
Step 4: Now, your Vnet is created. Let's add a subnet into it. Click on the subnet, then click on add subnet.

Step 5: On the next slider window, give a name to the subnet you want to create, provide the address range (if the address range is currently in use, you cannot change it). Then click on the ok button to create the subnet.


